


![]()
You’re all moved in! Great!
Now that it’s yours, it’s time to customize your new home to truly make it yours. Chances are, you’re looking up and down Pinterest and Google for different interior inspiration boards. Look no further! We’ve pieced together a how-to on one of the latest decorating trends: gallery walls.
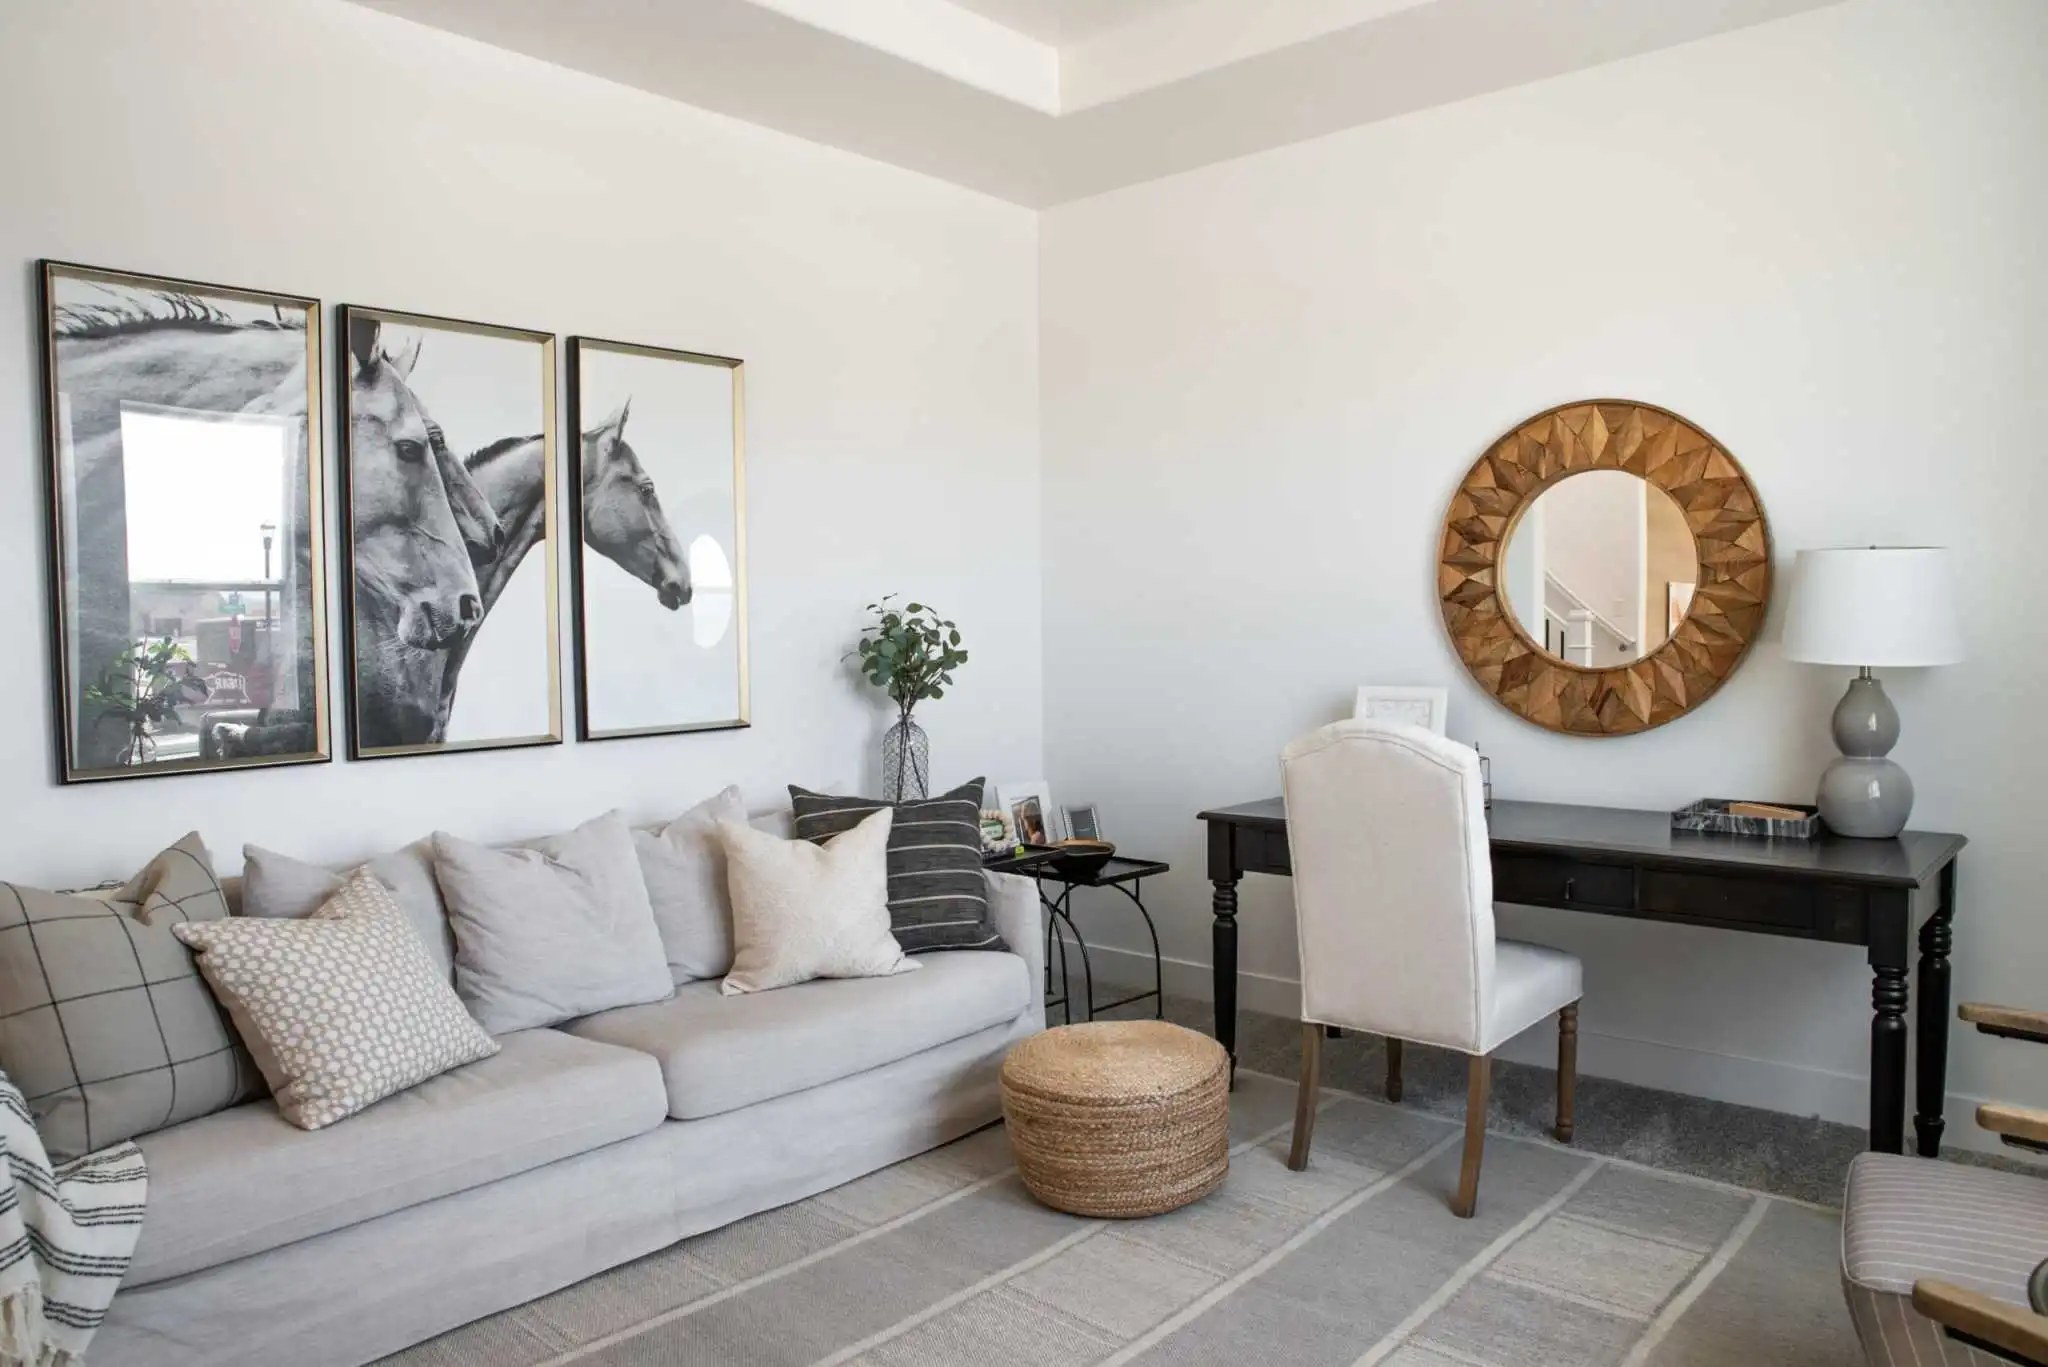
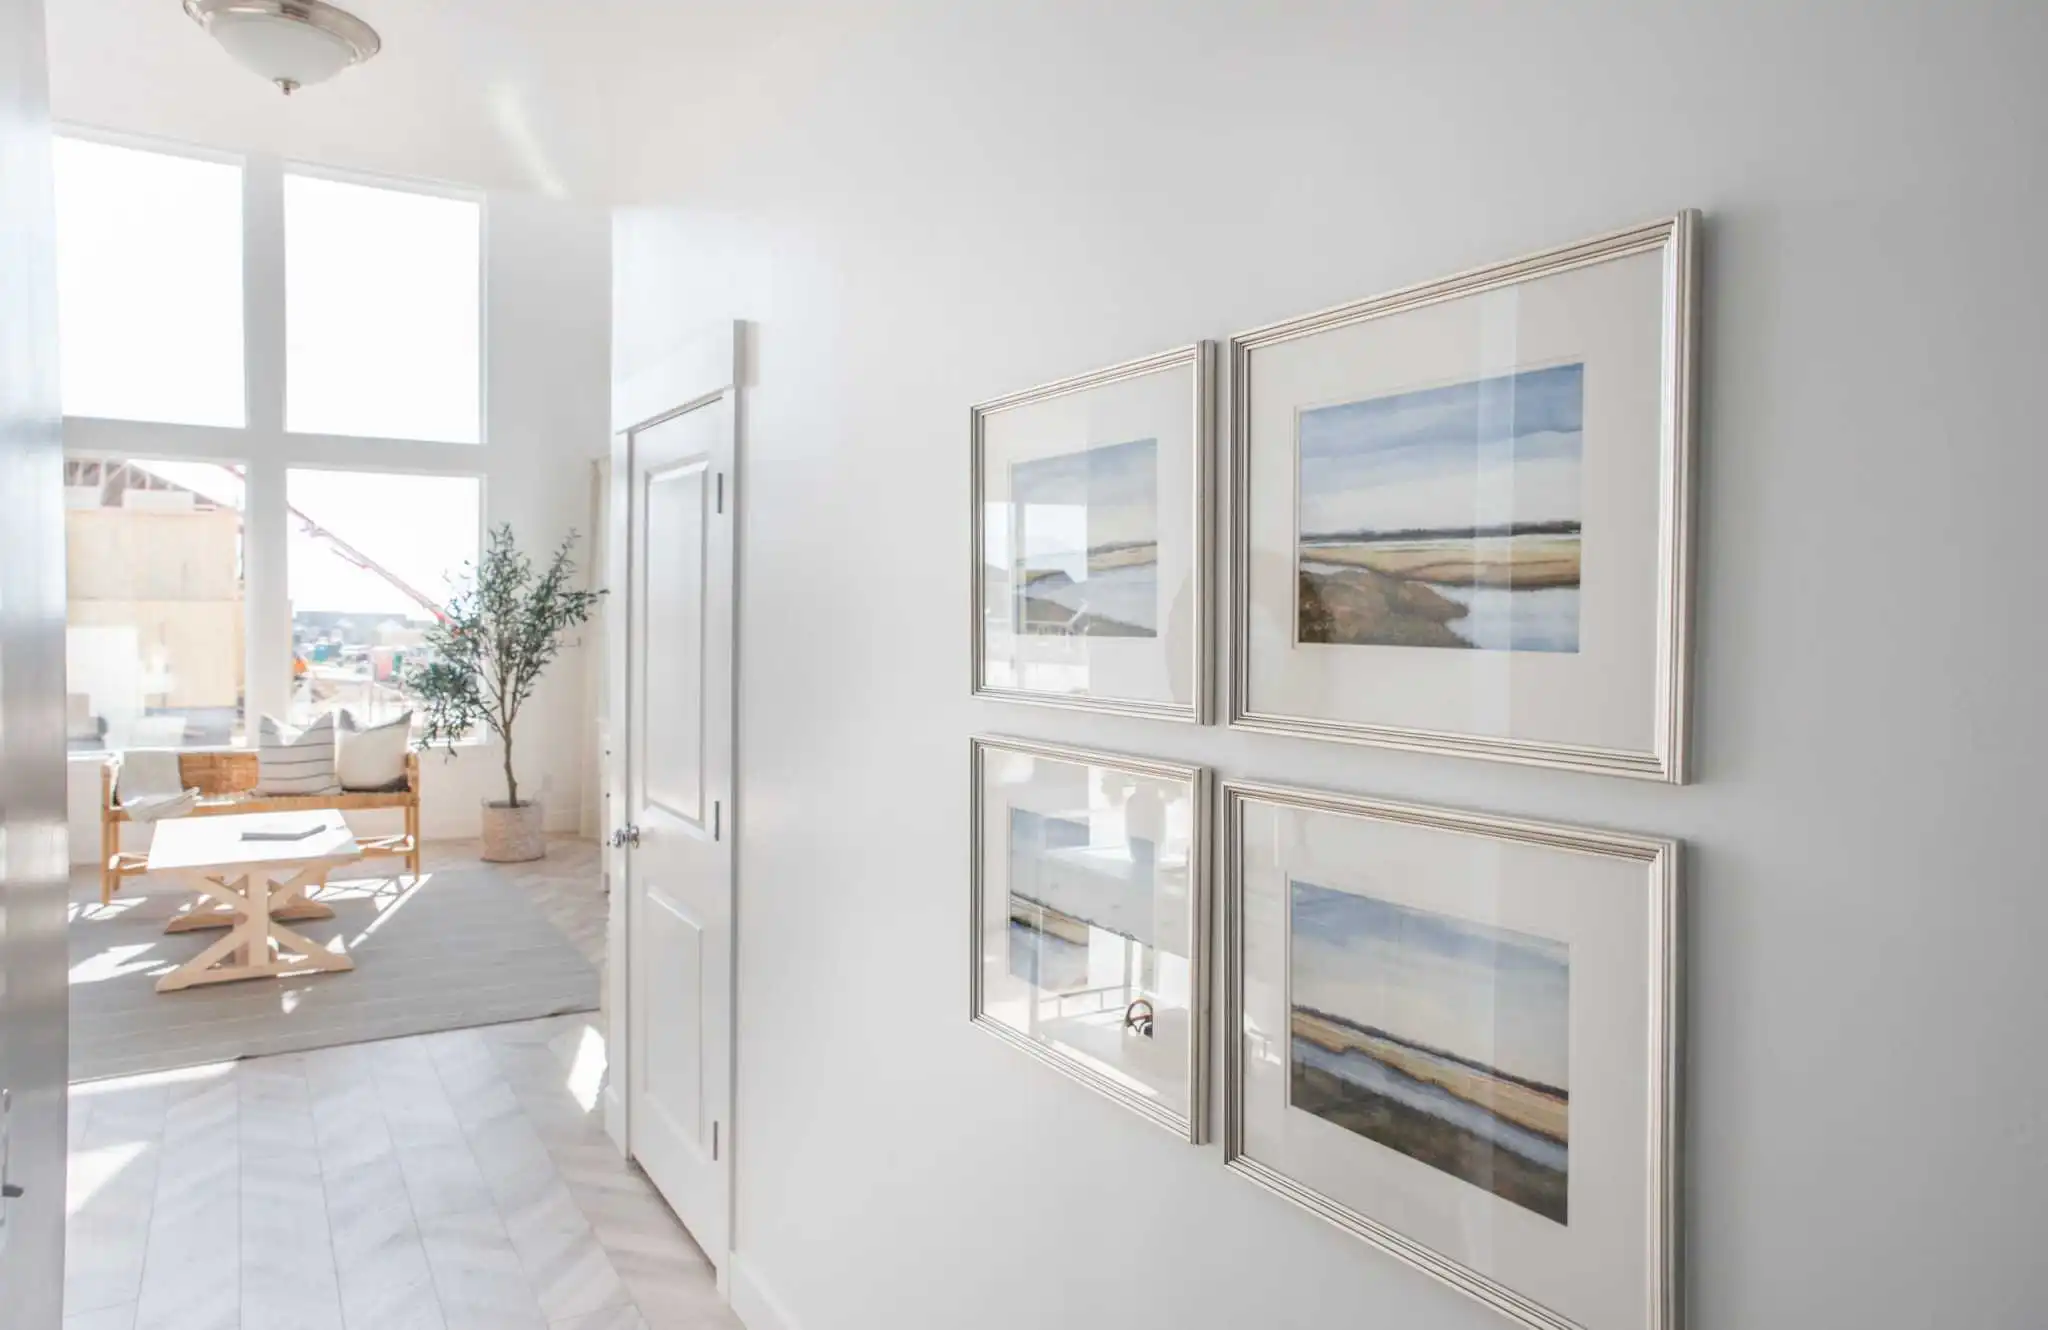
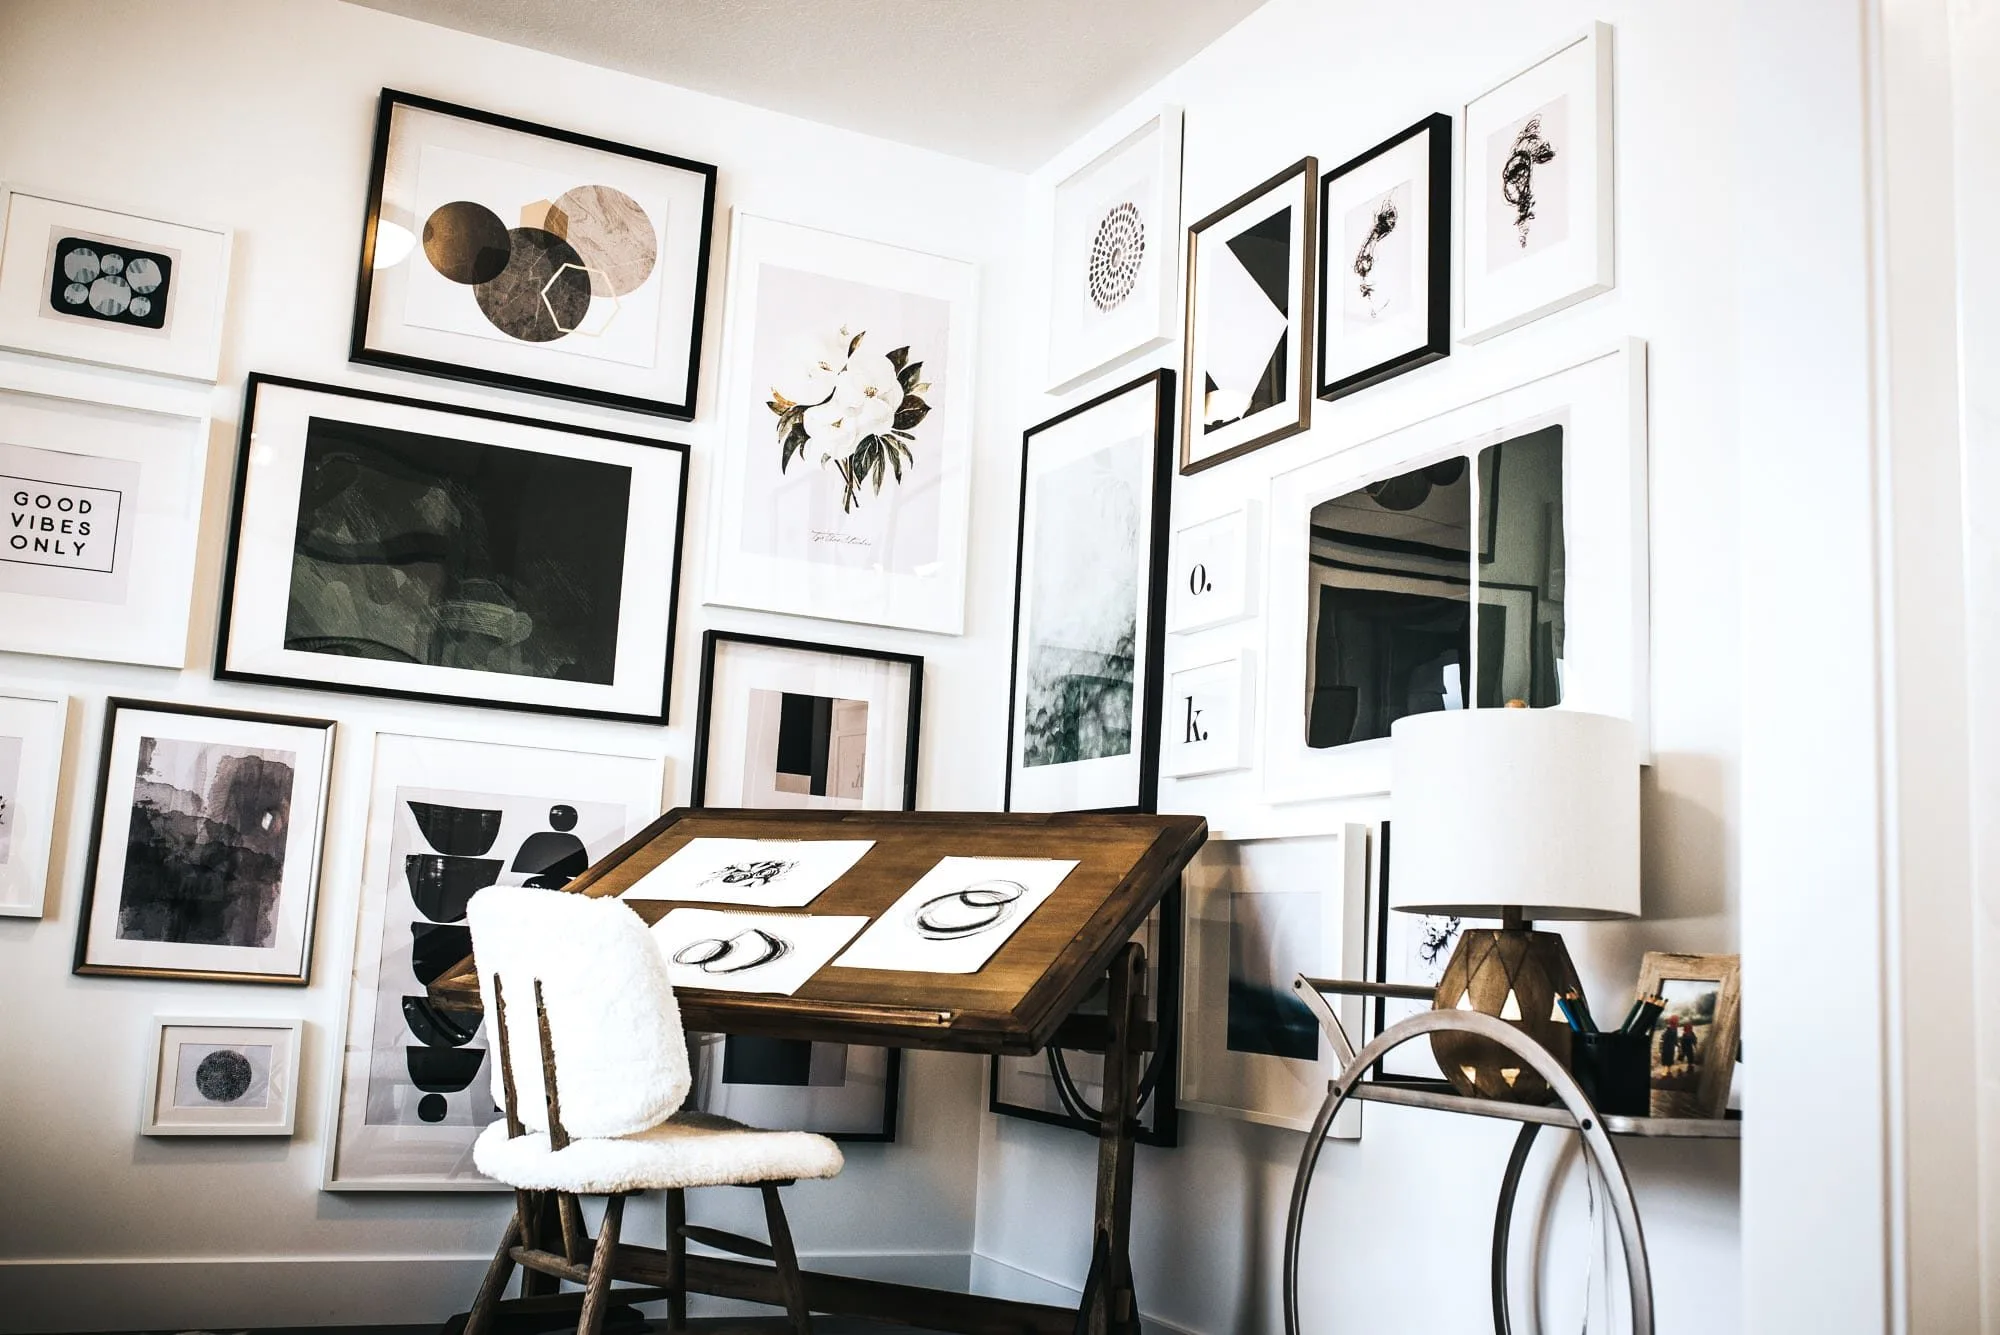
Gallery walls (also known as wall collages or photo walls) are a unique and fun way to brighten up your blank canvas and are a fun way to decorate a large wall space.
In a collage wall, you don’t have to pick just one picture; instead, you get to pick a bunch of your favorites to show off all at once. Plus, if and when you get tired of your first set of photos, you can easily swap them out and rearrange them to create a fresh and new series. The gallery wall is a great alternative to replacing bigger pieces of art, mirrors, or whatever else you choose to adorn your wall with. Once you learn these tips on how to hang a picture collage, you can be confident that your picture collage will make your walls look amazing.
First, you have to pick which wall you want for your gallery wall. Perhaps you’re doing this in your entryway, right for people to see. Or, maybe you’re doing small wall collages in the bedrooms, in a hallway, or even in the kitchen. Wherever you choose, you can be certain it will draw attention.
Next, it’s important to decide what look you’re going for. Do you want all the frames to match in style and color? Are you more of a mix-and-match type person? Or are you looking to just use what you have in an eclectic, casual sort of way? Are you after square frames? Rectangles or circles, perhaps? A combination of shapes, sizes, and frames? Anything you choose can work together for a unique wall photo collage that showcases your favorite imagery.
This step is all about you and your tastes. Are you wanting to showcase family photos? Maybe some photos you’ve taken on vacation? Perhaps you’re after a pet photo collage, or maybe just pictures you’ve taken day-to-day? It may take some trial-and-error to get your favorite images picked out, and we advise that you keep 10-15 backup choices on hand to quickly swap photos out if they’re not working the way you envisioned.
Here’s where it might get messy for a few days because you might take a while to arrange, rearrange, swap, move, and pick the right photos. You might change out frame shapes and photo sizes during this step, and that’s okay! Or, you might lay them out and love the gallery wall at first sight. Whatever the case may be, you’re one step closer to completing a beautifully unique wall collage.
Creating a gallery wall template can be as simple as choosing one size frame, and then tracing out its borders onto a piece of paper, cutting out the traced section, and repeating. Whether you choose one frame size or multiple, be sure to label the size on your cut-out template.
If you’re looking to mix it up with different-sized frames in your gallery, but you’re unsure how to properly balance the layout, there are some great template suggestions on Pinterest to help you get started. Or, you can download the mobile app from Art.com and make use of their Gallery Wall Designer feature; it’s almost scary how easy it makes your job.
If you do this step, swapping out photos down the line and printing photos for different gallery walls will be much easier because you’ll know the dimensions of the different frames that you’re showcasing on your wall.
This step can also be beneficial later in the process because you can practice plotting the photos by taping them on the wall to determine if everything looks right before placing a command strip or hitting a nail into the wall.
This step is important for the technical foundations of the wall, to make sure that you know how much space you have, to know what the center is, and to make sure the area of the wall is able to hold frames securely. Having the center point established will also keep things on track during the hanging process, to ensure that everything remains even, centered, and level.
Nothing is worse than getting 90% of the way through hanging a collage and then realizing you don’t like the way it looks. As we mentioned earlier, arranging, taping, and rearranging the paper templates is the final step before finishing your wall photo collage. It lets you preview every design, so you can find the one that best fits your space and aesthetic. Don’t be afraid to change something if it’s not meeting your expectations. Once you’re happy with the way it looks on the wall, you’re ready to start hanging!
Measure down from the top of the frame to see how many inches below the top the nail will actually sit. Find the center of the template and measure down the same amount. Mark the template with an x, and then hammer your nail right into that x and through the template. Once the nail’s in the wall in the center, remove the paper template from the wall and slip the frame onto the nail. It’s that easy.
This blog has been all about showcasing the amazing memories you’ve made in the past. EDGEhomes wants to give you a home to make memories in for many years to come. Our talented realtors and interior designers will guarantee you find your dream home without breaking the bank. To get started making memories, schedule a consultation today!
02/25/2015
SCHEDULE A VISIT